Choose Your Adventure with Scratch Jr

I’m enjoying teaching Scratch Jr during the 1st-grade classes’ weekly tech time. I still have my go-to Scratch Jr projects that I’ve blogged about but I’ve tried some new things out so far this year that I have enjoyed.

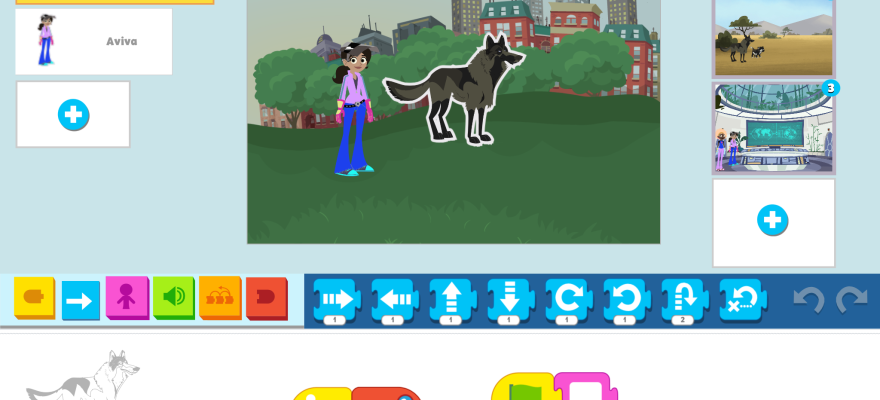
I like to fit my projects into the 1st-grade curriculum so when the teachers told me they were working on defining characters of a story, we used PBS Scratch Jr to create our own characters and animate them. When they started learning about the setting of a story, I had the students create a Choose Your Adventure (CYA) project.

1st grade CYA projects that were shared to my iPad

This was such a great project that I did this with all four 1st grade classes and we took the time to share the projects. (Re: -sharing: I have the students (with some help) Airdrop their projects to my iPad. My iPad is “mirroring” onto the classroom projector board. I get their “presents” and run their program for everyone to watch and enjoy. I ask the author to tell me which choice to make first)

In terms of coding, the Choose Your Adventure project introduced the “Start on Tap” and “Change Page” blocks for my 1st graders. I start the lesson by introducing what a choose-your-own-adventure style book is and talk about letting the player get to make a choice between two places to go. We then pick a starting background and choose two more adventure place backgrounds – now they have 3 pages.

Example character code

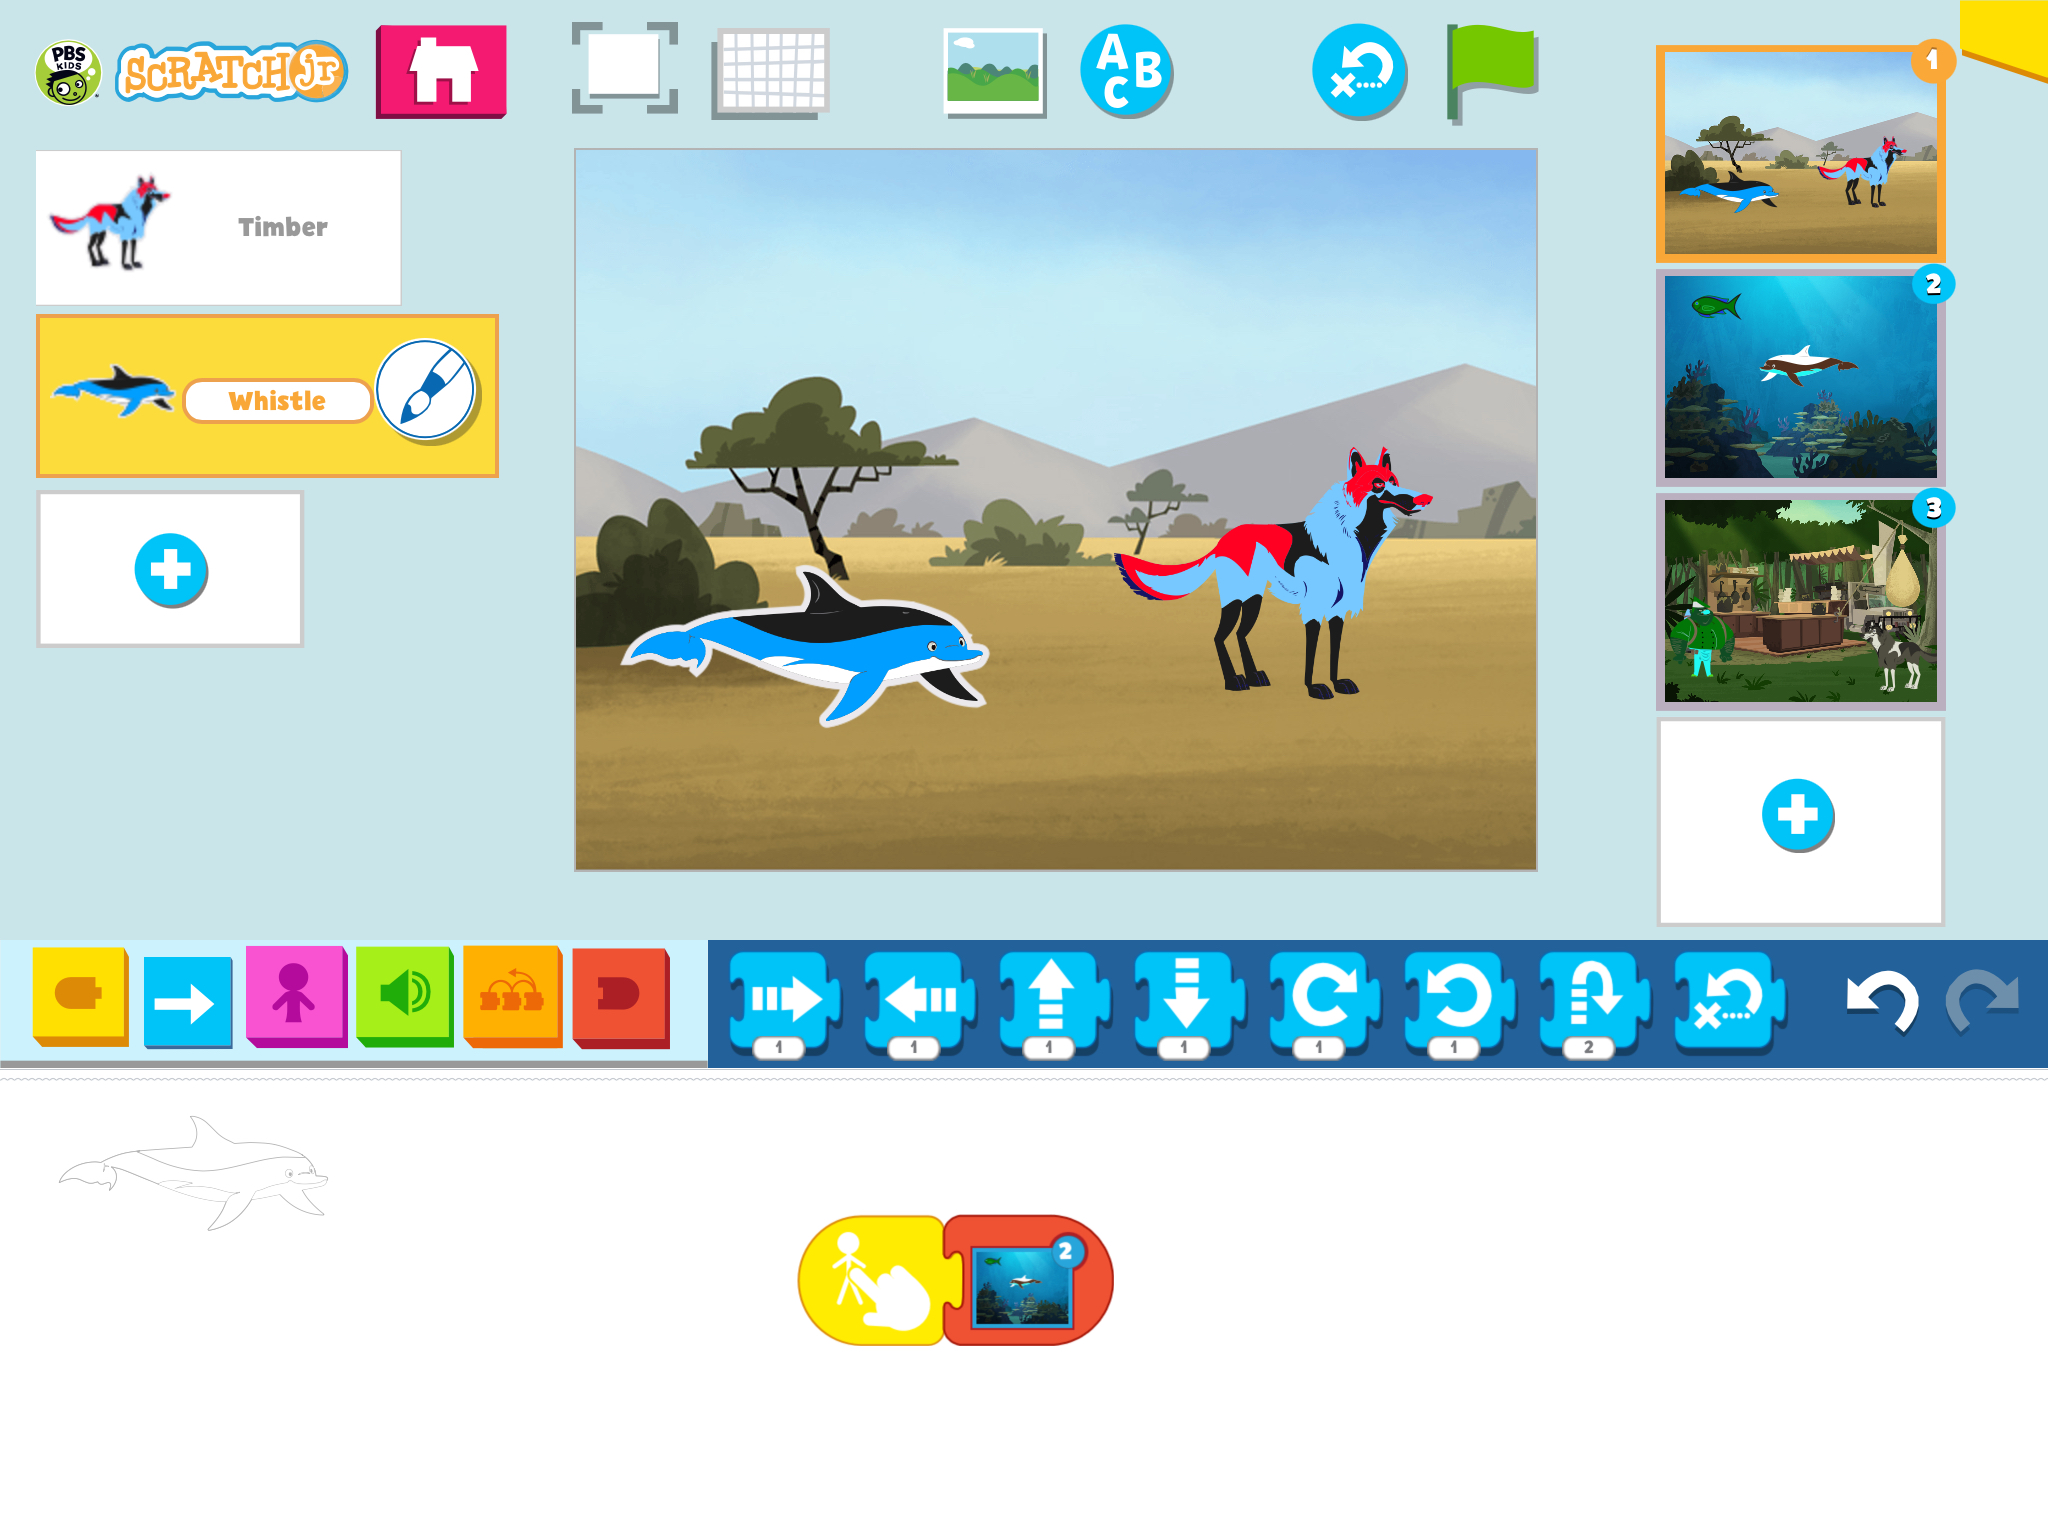
Next, they choose two characters for the first page. These are the characters the adventurers tap on to make the CYA adventure. The coding of these characters starts with two blocks – the gold “start on tap” followed by the red “change to page #”. Once they have the first page set up with navigation, I send them to those other pages to independently create the coding for the animated adventures. While they are creating characters and coding on those pages, I can circulate and help students. I generally ask them to test the program when I stop by their desk to see how it’s going.

Depending on the time, we can stop there and finish up on a second meeting. Otherwise, I have them go back to the introductory page again and add a title, like CYA, and some more code to the characters to let the player read the choices. These blocks are “start on the green flag” and “say”. The iPad keyboard has a text-to-speech button for the students to say the words if they don’t know how to spell them. (A super iPad feature for K and 1st grade). Other students may want to record their voice announcing the adventure choices.

Once their projects are tested they save them as CYA – I tell them that saving their projects as Project 3 is like having all the books in the library listed by number. “I want to read book 35 today.” And that generally gets them to rename their project.

I was really happy with the quality of coding and understanding of going to different pages. Some of them added “start on tap” to other pages to continue the adventure.

Other projects that 1st graders did this fall were Spooky Forest and Sunrise, Sunset from ScratchJr Curriculum activities. I’m planning to introduce Meet and Greet this year as well.

Last Fall’s 1st grade “Spooky Forest” and “Sun and Moon” projects

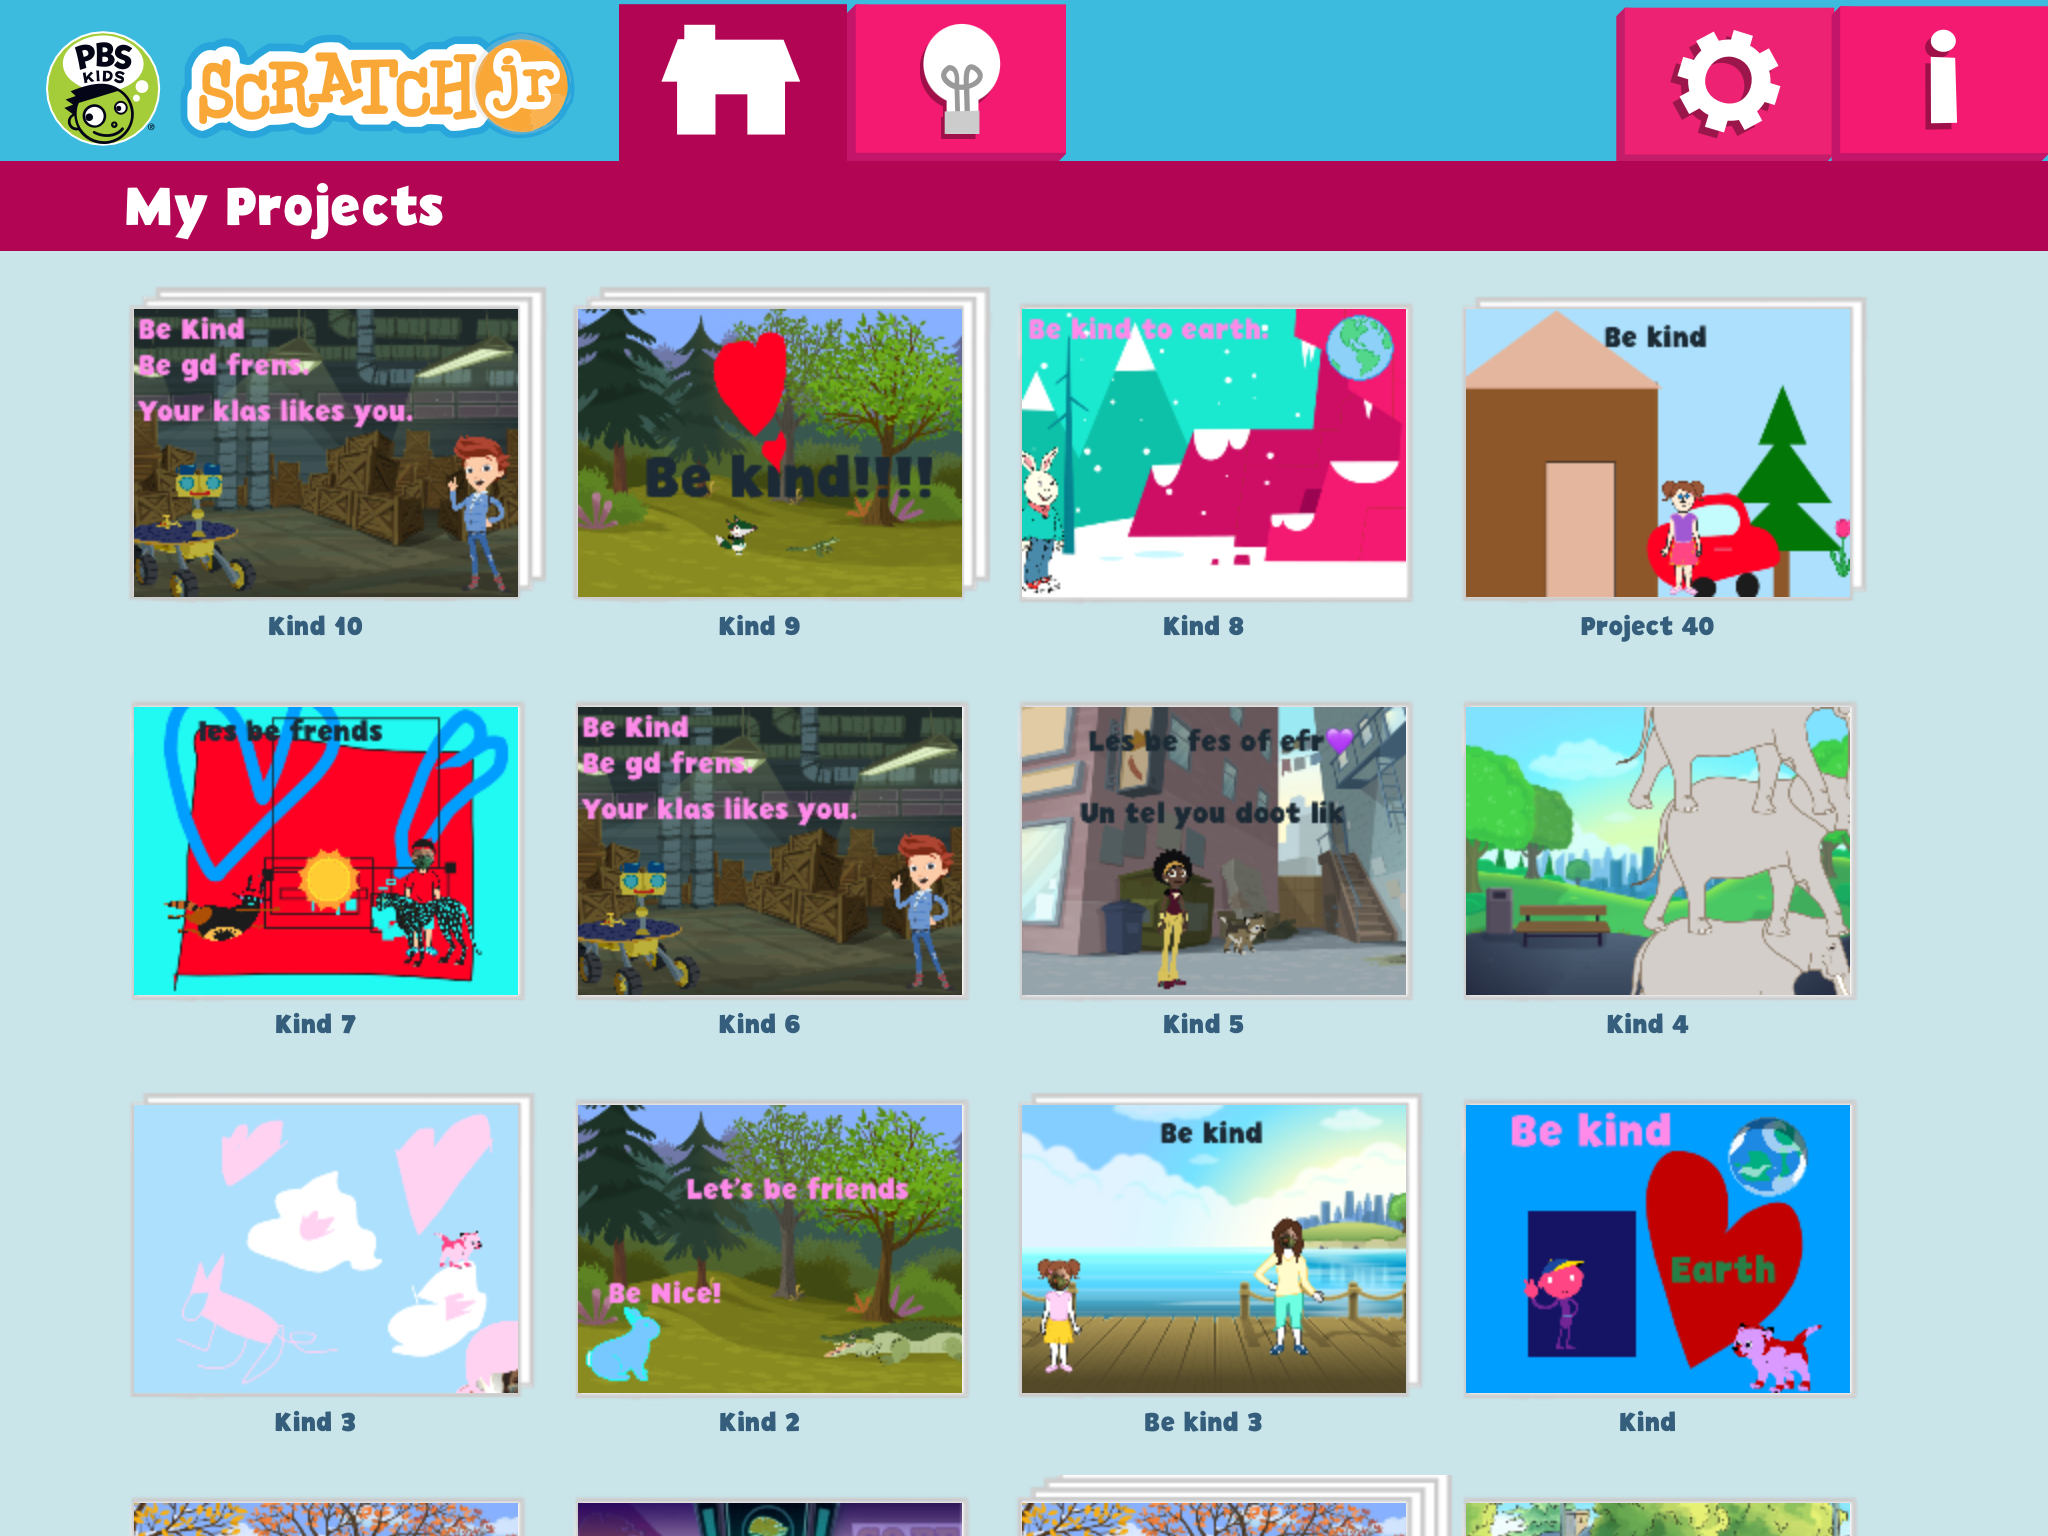
Next up is my own Be Kind project – with a tie-in to Digital Citizenship and February’s Be Kind online.

“Be Kind” projects from last year

International Code Club

This summer I’ve been hosting a weekly virtual code club for middle school students (ages 9-12) through my local library. It started slow at the beginning with one or less students each week. But over the weeks it has grown and now we are up to four or five!! It doesn’t sound like very much, but from talking to Christina from Code Club, that’s not unusual size for virtual code clubs.

I’ve been enjoying setting up the Scratch lessons each week. They included these topics:

Animation

Imaginary Sports – a Scratch Design Studio prompt for June

Music and Sound

Text-to-Speech & Translate

Examples from our studio https://scratch.mit.edu/studios/27193347/

Catch Game

Space Invaders

Pen blocks & Stamps

We have two more weeks where we will make a “How to” Scratch project and end with a “Surprise” project -using a prompt from Getting Unstuck 2020.

Each week I create a Scratch studio with some sample projects and a sharable document with some code tips or project instructions (or links to online project instructions), and I include the link to our weekly studio and virtual meeting. Students are invited to the weekly studio to remix what’s there and then share and add their project to the studio. I started out adding them as curators, but it was easier to temporarily open the studio to allow anyone to add projects and then turn off that option later.

Despite the low numbers, the meeting were successful in that those who showed up learned and created projects they were proud of. I’m proud of them, too. I like to spend the last 10 minutes letting the student share their screen to demo their projects – or let me play their projects if they’re shy. Later I will go and view any more projects that get added or shared to play, favorite, and comment on them.

This last week we found out that two of our participants actually live in Canada when one asked if we all were from her province. That’s the thing with online clubs, there’s no physical boundaries. I had to say, no, some of us were in New Hampshire. It didn’t seem to matter to her. Or any of us. We were having a good time coding and hanging out together.

I’m not sure how my club happened to get some Canadian middle school Scratchers. The library posts the offering on their website and parents can email to sign up. I always have a librarian as a co-host and second adult, as recommended by the Raspberry Pi Foundation (Code Club’s parents organization). She is the one to forward the meeting link and shared document to those who’ve signed up. Our meeting link is not on the website.

A couple of weeks ago I was commenting on one of my participant’s own Story studio to ask her if I could share her studio with the Creative Coders. Another Scratcher commented back and asked if they could join the club. I posted the library sign up link there in the comments. I wonder if they followed through? The librarian noted once, earlier in the summer, that one of the parents asked what time zone the meeting was in. So, I guess, that makes my code club an International Code Club. Pretty exciting!

I’ve learned a lot this summer, too. I’m more comfortable with the online format. I’m getting used to the awkwardness of everyone quietly coding for a half hour with very little questions. I’m quicker at navigating around and finding students recently shared projects. I’m learning what type of projects work in this remote setting.

If you want to know more about the project documents I share with the students, here’s an example (without the meeting link).

Your Name Animated

To start off the school year, I thought it would be great to have 3rd graders work on a Scratch project and I’ve been wanting to try the animated name project from Made with Code for a while now.  You can find the resource cards here. (I printed a couple of sets) Animating your name seems like a good beginner project but not one that I do in Code Club.  And who wouldn’t want to play with their name in code?

Screen Shot 2017-11-01 at 7.29.49 PM

We started off by creating a backdrop for the Stage with the drawing tools in Scratch. I didn’t want them using one from the library, but to make their own.  Then we brainstormed ways to animate the letter Sprites – bouncing, turning upside down, changing color, spinning, growing, making a sound, etc.  This got them thinking about the possibilities. Next, we started adding letter Sprites.  Each Sprite was coded to be interactive by using the “when this Sprite is clicked” event block and adding an action to it.


Screen Shot 2017-11-01 at 8.37.28 PM

Example of 2 different letters interactivity


I used the resource cards to support students who preferred directions to be written out or visual or struggled to keep up with the general pace of the class.

Each third-grade class added their own flair to the project. One teacher decided to take photos of the students with a green screen background.  The students added themselves as a Sprite to their name project and animated themselves.

Screen Shot 2017-11-01 at 8.36.46 PM

I can’t share any of the actual student works as they include both the name and photo of the students.  We are going to record a video of the project like we do with our cloud project and include it in the students’ digital portfolio.

Another third-grade was finishing up the name project so close to Halloween that we incorporated the Trick or Treat project in with the animated names.  I didn’t present this part very well.  I needed to explain the difference between adding a costume to a Sprite and adding a separate Sprite. A lot of students made this mistake and there was general confusion.

Screen Shot 2017-11-01 at 8.55.42 PM

My next task is to finish the rubric for this project (which I should be doing right now).  The students enjoyed this project but we need to wrap these up.

Coding Their Own Way

The students have begun their independent projects for our showcase in May.  They are really into their projects already.  At our last meeting, I met with (most of) the teams or individuals to go over their Game Design Document (GDD).  Over time I’ve been adding things to the GDD to make it more comprehensive but it has gotten a bit unwieldy.  Students don’t always fill it all out or their ideas don’t fit in with the description. I definitely need to reflect on the GDD and figure out what should remain and what can go.

Let’s go back to basics.  Why do I have the GDD?  Is it for the students or for me?

To make a project that takes multiple weeks to complete, but has a hard deadline, you’ll need a plan.  Planning is part of the engineering design process. In this sense, the GDD is for the students.

If you are working in a team, the need for a plan is crucial.  Who will create the backdrops? Who will code the Sprites? Do we agree on the gameplay? A team definitely needs a GDD to define roles, divide the labor, and to communicate ideas.

How do you know if it is a project that can be done in 4 weeks? What parts of the game are you not sure how to code? What should you work on first?  These questions are why the GDD is for me.  I see myself as the project manager for these 10-year-olds.  I want to ensure a project isn’t too large: “There will be 5 levels and a boss level with an army attack and when you die you turn into a zombie with a special power and then….” Yikes. I want to see that team members have communicated their ideas and agreed on the design. I want to make sure each team member has a job to do.  I want to know what parts of the coding will be tricky for them so I can find some examples of code to help them.

All of the projects this time seem pretty well thought out. There are no “try not to laugh” projects.  No Makey-Makey projects either, sadly.  There are a couple of maze games, two games with gravity, one animation, one karate game, and some adventure games.

One or two of the projects aren’t very complicated and I worry that they’ll finish too early.  I shouldn’t, though.  It will be good to have a couple of more polished, well-tested games for the showcase.

Screen Shot 2017-04-23 at 5.12.45 PM

This student is going to use this as her independent project and make a “Flappy Bird” type game.

I can’t end without sharing a few screenshots of student work.  The previous week I showed the students how to use the Tips tab to get step-by-step instructions on different games.  I suggested they try the “Make It Fly” tutorial.  This was an optional project and many chose that time to work on their GDD instead.

Screen Shot 2017-04-23 at 5.13.22 PM

This shows interesting graphic editing skills and some good coding.

Screen Shot 2017-04-23 at 5.14.47 PM

Makes you smile.

Poetry Generator

While planning Wednesday’s Code Club during a snow day on Tuesday I came across the Code Club World project Ada’s Poetry Generator.  This is a new project for me and I liked the way it introduced and used lists.   Arrays and lists are extremely important data structures in programming – right up there with loops and variables. I’ve never introduced lists in Scratch before.  I also liked how this project wasn’t a game but had the potential for a lot of creativity and fun.

I mocked up a project with Scratch Cat instead of Ada Lovelace.  (I did talk briefly about Ada when introducing the project.)

Screen Shot 2017-03-16 at 8.45.33 PM

I added some “talking” animation to Scratch Cat by duplicating costumes and morphing the mouth into different shapes.  Then coding the costumes to change when the poem is “spoken”

Some students whined a bit about poetry and not a game but I ignored that because I knew they’d like it once they figured it out.  I’m hoping someone chooses to make a MadLib or something similar for the final project.  If not, I may see if we can use this in some language arts project.

Here are some nice examples:

Screen Shot 2017-03-16 at 9.00.09 PM

Computer generating poetry with lists

Screen Shot 2017-03-16 at 9.06.15 PM

This coder really liked gluteus maximus, and unhelpful list naming conventions.

Screen Shot 2017-03-16 at 9.01.11 PM

Awesome animated mouth

This coder is my animator to be.  He drew and animated the PacMan and Ghost being eaten costumes… then he coded the poem in the last few minutes.

Screen Shot 2017-03-16 at 9.02.52 PM

Future animator

These two below took the morphing a bit to the extreme but the coding (and poetry) is well done:

Screen Shot 2017-03-16 at 8.56.52 PMScreen Shot 2017-03-16 at 9.15.40 PM

I enjoyed reading all the funny randomly generated poems that the students created.  I was glad I choose this project for my Code Club.

Game State – Game Loop

This week we tried out Code Club World’s Desert Race project.  One Code Club member used this for his independent project last round, so we had one expert.  We used his final project to demo the game. Screen Shot 2017-03-12 at 11.20.11 AM

Desert Race is a fairly simple 2-person race to the finish.  The main concept in this game is setting a game state variable to control the action. In event driven games is important to control the allowable events – like when to start. And we don’t want anyone to cheat by starting before the start signal.  Setting up a game state variable, ‘racing’, like a Boolean with 0 (not racing) and 1 (racing) is the concept I was hoping they would take in while making a cool two person game.

Defining a Boolean for game state is the first step to building a Game Loop that programmers use when creating more complex games.

Scratch Wiki also refers to it here: https://wiki.scratch.mit.edu/wiki/Game_Loop.

My fourth graders may not ever get to that level of programming here in Code Club, but it is a powerful idea. I have used this programming technique in (non-Scratch) games I’ve created in the past and found it useful.

I also made a quick version of the project adding a bit of 3D perspective with my Space Race project.  The racers (cat and dog) get smaller as they head to be the first to reach the planet.

Screen Shot 2017-03-12 at 11.26.57 AM

The students made some nice games. Many customized their Sprites and a couple recorded their own “win” sounds.

This one below has some almost imperceivable pitfalls that send you backwards (the opposite of a booster).

At the end of the day a few students asked to be able to keep working on the Desert Race project for next week -they needed more time and were enjoying the project.  I think I’ll let them, but I’ll need another project for those who finished or want to move on.  So I asked one of the two girls in the Club what she would like to work on and she said, how about making an ebook.  I asked if she meant like an animated story?  I’d love to focus on animation more – there are some great techniques to making things look like they are moving – I love Tumbling Santa.  Also, I’m thinking I need to show her Bubble103’s Scratch projects.  Maybe she wants to make a tutorial (nonfiction ebook).  There are a lot of How To projects on the Scratch site.  I’m considering these two options for next week.

Also awesome this week was this project:

Screen Shot 2017-03-12 at 12.18.11 PM.png

This student’s race project was lost when Scratch 2.0 offline editor crashed. He was mostly done and he lost all his code. Instead of recreating it, he made this cool project. (It is a bit glitchy, but neat.)

Spring Code Club Session Begins

Code Club session #8 met for the first time on Wednesday.  There are eighteen 4th graders and two high school volunteers.  This is the second time I’ve had a mixture of students from both elementary schools in my city in one club.  Another thing that is cool about the Spring session is that I have returning Code Club members, or, as we call them, “experts”.  Only 5 students are new to Code Club and there was only one student I didn’t know.

screen-shot-2017-03-02-at-6-56-38-am

A New Scratcher’s take on Maze game

After introductions, I asked the “experts” what favorite project they had from the last session of Code Club.  They remembered and liked the Maze game, Space Junk and Chatbot from CodeClubWorld. They also enjoyed the projects they had created themselves, not surprisingly.    I like starting with the Maze game and had already chosen that project for our first meeting.  It’s a simple game with many ways to make it more exciting and complex.

We started out by reviewing the maze design and refreshing our programming vocabulary.  What was the object of the game? How does the Sprite move (arrow keys or follow the mouse were options)?  What happens when you touch the edge of the maze?  How do you win?  Then we talked briefly about ways to make it more exciting – more levels, obstacles, villains, etc.

screen-shot-2017-03-02-at-7-08-28-am

Then they got to it. They were fairly independent coders, for the most part, and they helped each other a bit, too. My high school volunteers and I think we will be able to try some more complex coding  projects this round.  It was a really fun 75 minutes.

Thinking ahead, here are some goals for this session of Code Club:

  • Encourage more animation: We have some artists, so I’d like to share with them and encourage more creative uses of costumes for animation effects.

Screen Shot 2017-03-02 at 7.00.49 AM.png

  • Explore “more blocks”: someone is already exploring defining their own blocks.  I’d like to encourage more of this.  As well as random numbers.

Screen Shot 2017-03-02 at 7.02.18 AM.png

  • Clearing up misconceptions: We will have to revisit some concepts like the forever block and support better debugging habits

screen-shot-2017-03-02-at-7-03-35-am

Find the glitch in this code.

screen-shot-2017-03-02-at-9-58-30-pm

It seems this “expert” puts everything in forever blocks.

  • And finally – I want to use MakeyMakey‘s this time. I told them I want to use them with our projects – especially our final projects. Those couple of students who have played a bit with MakeyMakey’s were quite excited. I’m really excited (and a bit nervous). I don’t have much experience using MakeyMakey devices, with or without students.  Luckily that won’t stop me.

Scratch @ MIT 2016

Screen Shot 2016-08-12 at 11.20.28 AM

I was at my first Scratch Conference at MIT Media Lab last week (#ScratchMIT2016). It was fantastic!  I met so many awesome Scratchers, educators, researchers, developers and enthusiasts.  It was wonderful, inspiring…  “I came for the workshops and stayed for the community.”

I met the awesome Scratcher Bubble103 and her mom the very first evening and didn’t even know I was meeting a Scratch rockstar.  I met people from all around the globe and had great conversations in between keynotes and workshops and during breakfast and lunch breaks. I have made so many connections, it is quite awesome.  The Scratch team is brilliant, kind and adorable.

Screen Shot 2016-08-12 at 11.35.09 AM

Dinner was quite fun, too.

Here are some take-aways from the conference that I hope to implement during the (fast approaching) school year.

  • read Seymour Papert’s Mindstorms
  • work on parent involvement plan – the keynote about Pathways to Participation helped me understand that I need to support students beyond the school environment.
  • more collaboration with the art teacher.  This is the year when art and math and code will collide!  I’m going to introduce Beetle Blocks and the watercolorbot.  From Art Alive there was the interacting with art using Scratch and MakeyMakey piece that we might delve into. I hope we’ll do more Scratch animation, too.  STEAM on.
  • introduce the development of cheat codes to help debug Scratch at Code Club.  Rik Cross’ workshop Practical Debugging in Scratch  was super informative. Students will enjoy the idea as well.

    practical debugging

    Photo from a @Raspberry_Pi tweet

  • Scratch Jr and the Writer’s Workshop in 1st grade. Scratch Jr has come along way from the first time I saw it and I’m excited about it again. I already have a homeroom assignment with 1st grade teacher who’s tech savvy so this will not need a big sell.
  • Mathematical Simulations in Scratch.  I know my students are NOT high school math level students but I liked the way Patrick Honner was able to embrace the tools the students knew (Scratch) to work on real math problems.  I’d like to try some math modeling in Scratch -like the Monte Carlo method.  I’m going to have to see what comes up in 4th grade math class and the Math Forum Problems of the Week and see if anything looks like a good candidate to model using Scratch.
  • Continue to develop this community. Now that I’ve met all of these people I want to keep in touch whether on the internets (Twitter, Facebook) or at a ScratchEd meet-up.  I am definitely thinking about visiting Mags in Ireland.  Who knows, maybe there’ll be a Scratch conference in the UK or Europe next year.


This all looks doable and like hard fun.

(Note: there are things I will have to get, too- embroidery machine for TurtleStitch, 3-d printer for Beetle Blocks, more Makey Makey‘s.)

Scratch On!


Cloud Project

With the success of the 3rd grade Superhero Scratch project in March, I decided to see if 2nd graders could make a similar project and be successful.  They study cloud types as part of their science curriculum so that’s the direction I went.

Screen Shot 2016-05-04 at 7.17.20 PM

This project was very similar to the 3rd grade project but the drawing was easier – simple background and a white cloud – although even that turned out tricky.  I trimmed down the code required to 5 lines.  Still it took a while to complete.  I have 2 of the 3 class videos completed.  The other class just needs to Record Project Video and I’ll have all of their clips ready to put together.

Step 1:  Introduction to the project:  I showed the class what the project was going to look like and laid out the steps we were going to take.  Many were excited that they were going to be on YouTube.

Step 2:  Draw the Background: In the computer lab we used Paint to draw the background.  I modeled drawing a horizon line, then using the fill bucket to fill in the sky and the ground. This could be done in Scratch as well.  Save the Paint project and research clouds while everyone finishes up.

Step 3: Draw the Cloud: We used Paint to draw the cloud.  I modeled filling in the background with gray or light blue and then using different Paint brush types in white to draw the cloud they had chosen: cumulus, stratus or cirrus were the 3 types that we ended up using.

Screen Shot 2016-05-04 at 7.13.45 PM


Here’s where Paint and the different brush types helped add texture to the clouds.  Save again.  (I basically did one step per lab time, just so I didn’t lose anyone)

Step 4:  Import the Assets into Scratch 2.0 (offline editor) – this was their first time in Scratch so we had to look around and notice the Stage and Sprites, code blocks… etc.  Then we “cut” the Scratch Cat away and imported our background to the Stage (our Paint file didn’t quite fill the Stage, but that turned out not to be important when the video was cropped to  wide-screen in production)   Next we added our cloud Sprite.  The Sprite included the gray or blue background but we removed that with the fill bucket by filling in “nothing” or “invisible” over the background.  I’m not sure what is the best term to give to setting the alpha channel. This was a bit of a tricky part.  Also resizing the cloud. Save the Scratch project – I had them save it in their picture folder where the background and cloud files were.

Screen Shot 2016-05-04 at 7.12.58 PM

Step 5: Coding the Animation: It’s only 5 lines of code.  When the green flag is clicked, the clouds says it’s name and then floats to the left or right forever (bouncing off the edges). When I modeled this, we noticed that 10 steps at a time is too fast for a cloud.  1 step is more cloud-like. I made half-sheet printouts of the 5 lines of code.  I wrote the cloud names on the board so they could spell correctly.  Saving really seemed to be our biggest issue.  I did spend some time troubleshooting clouds not to flip upside-down or go off screen.

Screen Shot 2016-05-04 at 7.18.18 PM

Step 6: Record Project Video:  The last step.  I wrote up a detailed step-by-step for my sub, hoping it would happen. The other two classed did a great job but occasionally would forget to click the green flag, so we got 20 seconds of a un-animated cloud.  Having the 2nd graders do this step is a big time saver for video production.

Screen Shot 2016-05-04 at 7.14.47 PM

The next step was for me to convert the project files from .flv to .mov or .mp4, (I used Free MP4 Converter  software) put them together in movie making software (I use a iMovie at home, but WinMovieMaker at work), find some cloud music –Ferde Grofé’s Grand Canyon Suite seemed to fit the bill. And finally, upload to YouTube.  I showed one class their video today and they were pleased, although some couldn’t pick their cloud out of the group.  -hmmm, maybe a bit more customization of the background…


Here are the links to the YouTube videos:  MacNeil’s Class Video & Horne’s Class Video

I will see next year when these students are 3rd graders if making the Superhero project is easier or if we can do more with it.  I wasn’t able to do this project with all the 2nd grade classes, but it is a start.

Oo-Ah-Animation

The Scratch project we tackled last week was not a game but a straight-forward animation project. We tried the Fireworks project from Code Club World resources.  Not all of my Code Club students will want to make a game for the final independent project.  Some may want to do interactive storytelling with animations instead.  One of my goals is to expose them to some of the different types of things you can make with Scratch so when it comes time to design their own project they can say, “oh, yeah, we did something like that.” Or, at least, I can say, “Remember when we did such-and-such.  That sounds a lot like what you want to do.”

My parent volunteer introduced the project, talked a bit about animation, and gave them the choice to design their own rocket sprite and many of them did. I know I want them designing their own stuff, but give them an option or two and they’ll run with it. Have I mentioned that they are a creative bunch? They are little testing testers, too, and have no qualms about setting speed to a very large number or having a screen full of sprites.  Kudos for Scratch for not crashing in these cases.  Just goes to show that Scratch was built for and tested by kids.

What will this do?

How students test code.

The only misunderstanding I came across with this project was with the iterative approach to code building.  The directions had you start with a simple bit of code and then you built on it, testing as you went.  For example, the rocket starts with the simple scripts on the right (in the picture below) then you add the loop and conditional to improve the behavior and end up with the script on the right. I noticed a few of students who had all the different stages of the script in with their sprite and it was interfering with the expected behavior.

Iterative coding

The script on the left side is improved to become the script on the right

We only have time to try one more project before they start designing their own and there are a couple – maybe three – different projects I want to introduce. Now I have to decide.