Return to 4th grade Code Club

One of my high school seniors wanted to do a service project teaching coding to elementary students. He loved our field trip to the elementary school that shares a campus with us and wanted to know when we could go to his former elementary school (across town) and do the same.

I knew that would take a different approach than a field trip and I suggested an afterschool code club. We discussed the details and settled on 5 sessions, weekly, after school in January-February, 90 minutes long, for 12-15 students. He wrote the proposal email to the elementary principal and sought funding for snacks for the club. Everything fell into place.

News spread about our code club, and the roster filled up in a day and one of the 4th grade teachers volunteered their room for us to use. We also recruited high school students as coaches and found plenty of former code club students who remembered when they were in my code club and volunteered to help. We finished up our 5-week code club last month with 11 students and 6 coaches (and me). Here’s how it went:

Google Classroom for coaches to plan lessons

Logistics & Communication: I created a Google classroom for the coaches and a place to put all the materials and planning documents. There I could announce what project we would do next and the coaches could tell me if they could come or not. Although, mostly they would stop by my room and let me know. Three of the coaches were in my last CS class of the day and others would stop by if they needed a ride from one of those students, or to let me know they were taking the bus.

Scratch class with studios for each week

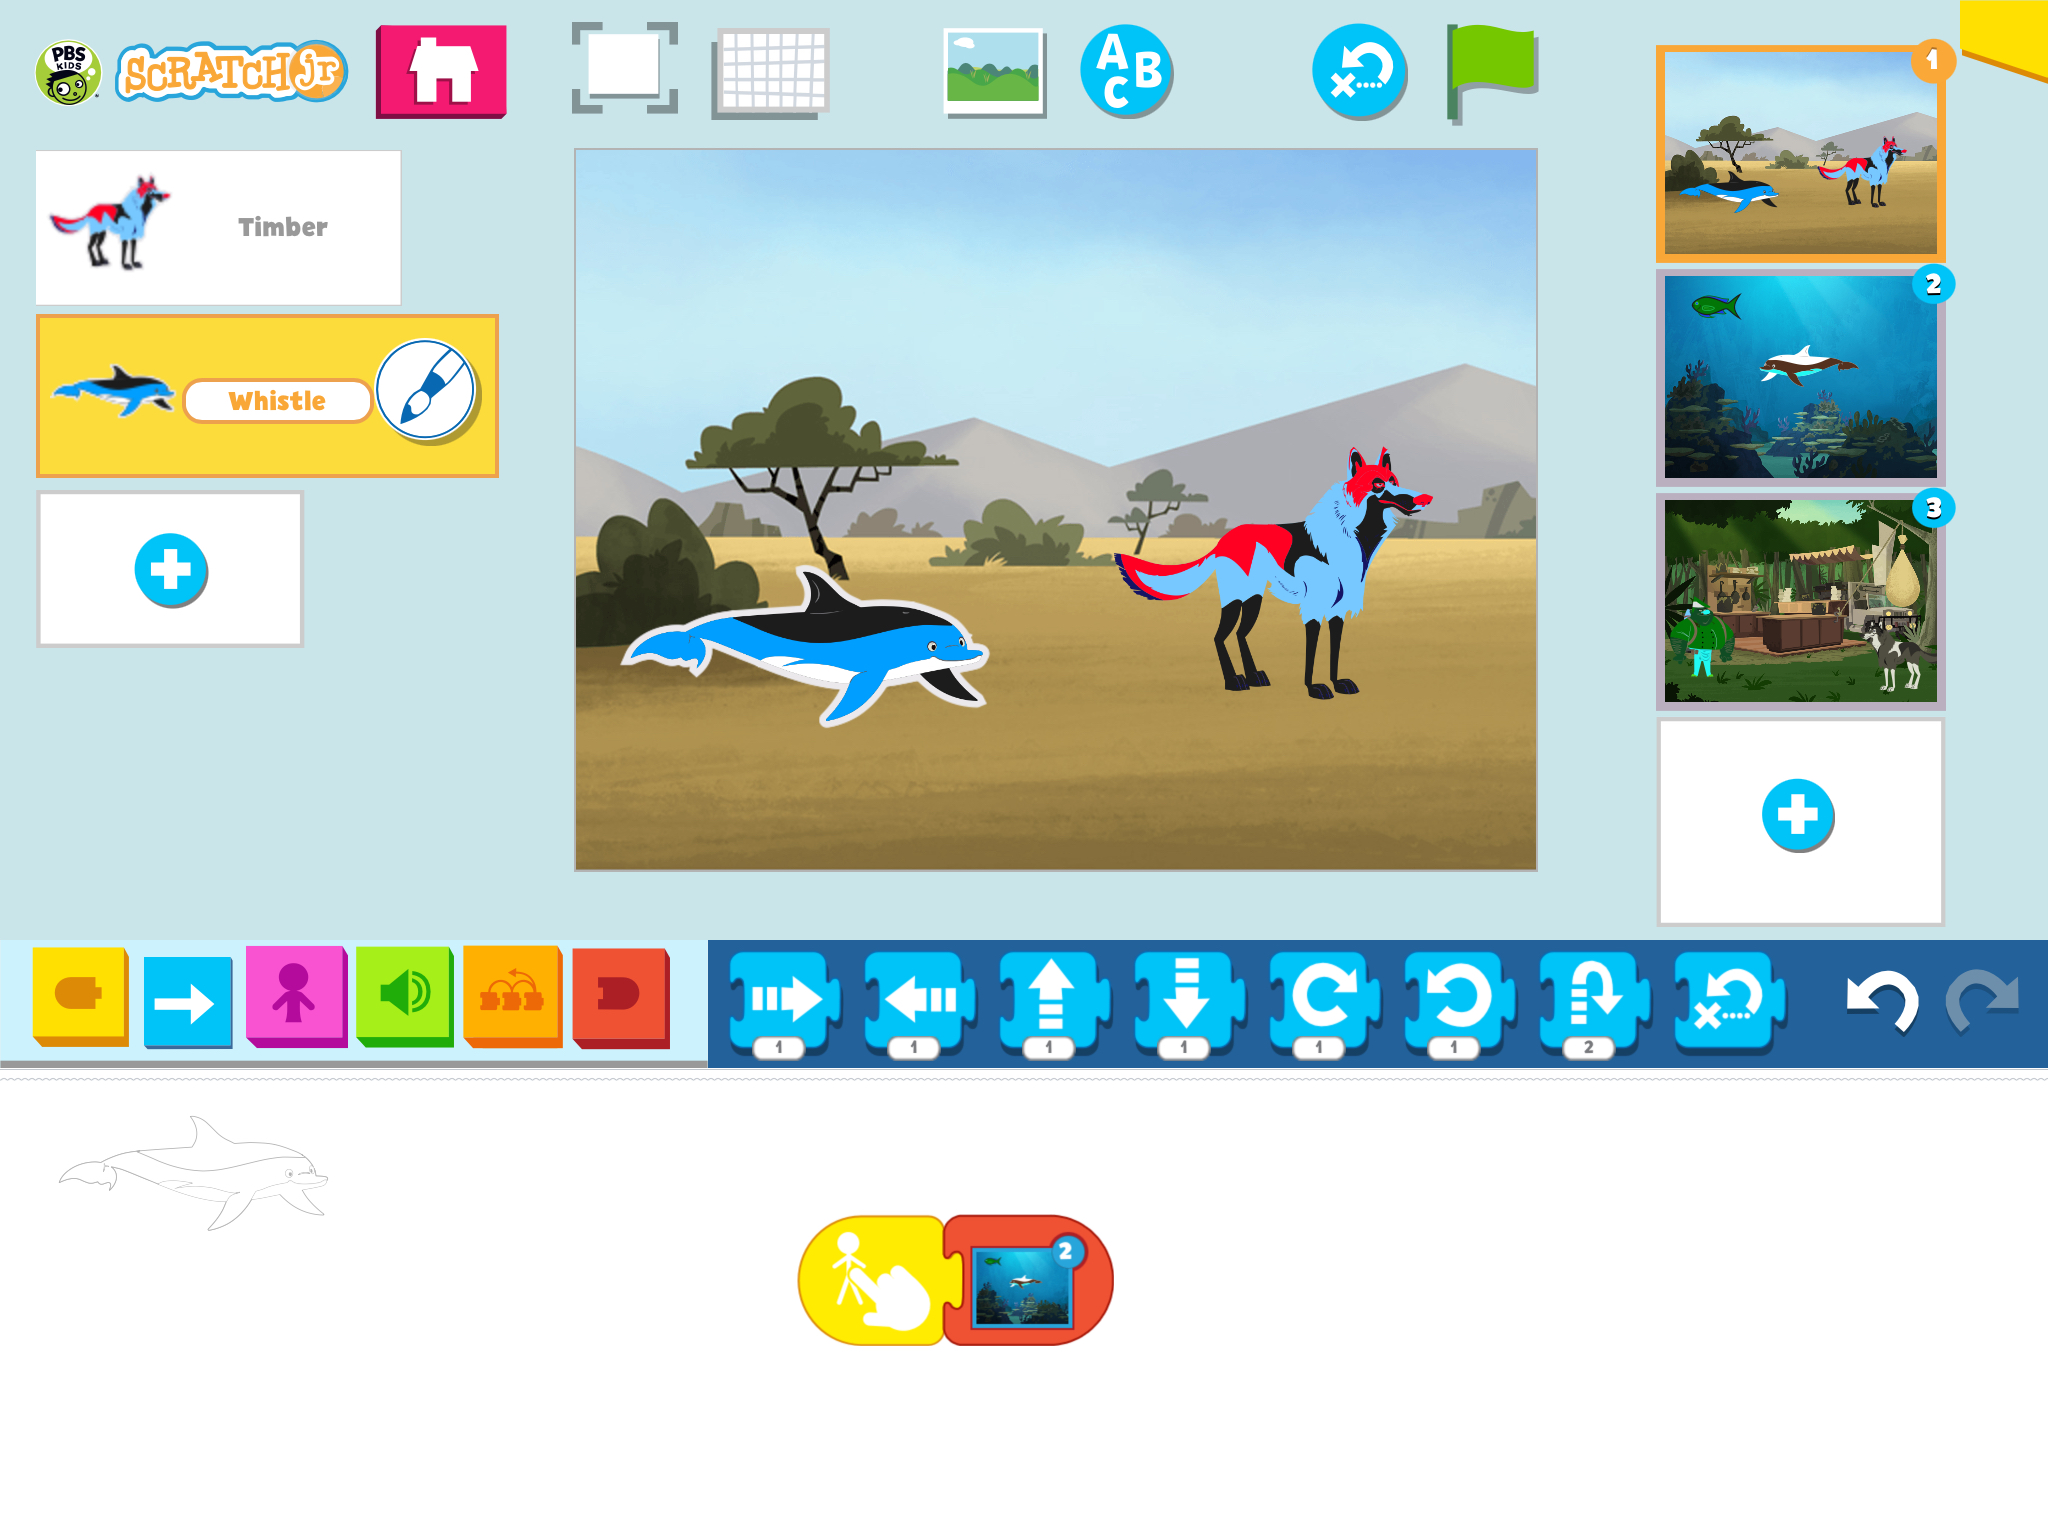
Accounts: For the code club members, I created a Scratch class and student accounts. Each week I would create a new studio and put in an example project. Near the end of each session, the coaches and I would encourage students to share and add their projects to the week’s studio. I or a coach would play each project on the classroom projector so everyone could see their project on the big screen.

Format: Each meeting was the same format: We would arrive and the students would be in the classroom. We’d take attendance, meet on the rug to discuss the day’s coding project, break for a snack, and then get started. Each student had a school Chromebook and they sat in table groups of 3-4. I or one of the coaches would do some live coding and others would hand out printed Code Club project guides or Scratch project cards. Coaches would circulate and help the students (as best they could) and miraculously we’d get a bunch of creative projects to share before the meeting ended.

Catch Game projects shared by first time Scratch coders.

Lesson 1: Catch Game – It’s a pretty big deal when you can make a game on your very first day learning to code in Scratch. I’ve written about Catch Game before. It’s a nice way to start. I used the Scratch card resources for the students to follow. (I print either 2 or 4 to a page to save on paper).

Chase Game projects shared by 4th grade Code Club students.

Lesson 2: Chase Game – another easy game that uses different code blocks. A lot of creativity here. I’ve written about this game as well. I remember the chase games 2 of my coaches made when they were in code club. I had the original Code Club World Felix and Herbert packet and I had the Scratch resource, but I wanted a hybrid of the two approaches, so I wrote my own.

Side-scrolling game examples

Lesson 3: The 4th graders love making games and the feedback from the parents was also positive – they noticed how much their student enjoyed Code Club, and were appreciative that we were providing this opportunity. So I found another game, Jumping Game, that was easy enough to make but different enough to be something new.

Virtual pets with text-to-speech by 4th grade code club members.

Lesson 4: Virtual Pet! This is one of my favorites and it’s not technically a game. With such a short 5-week program, I introduced a lot this week. In addition to the virtual pet game, I showed the students Zinnea’s Mouse Trail video. It was a nice diversion at the beginning of Code Club, but once they got into making their virtual pet, no one actually tried out making a magic wand. I also introduced Scratch’s text-to-speech block because many of the members had learned how to record their own sounds – but it was generally just them talking over all the background noise in the room. I thought they could have their pet introduce themselves with text-to-speech.

Noise Level: The coaches (my high schoolers) had noticed that Code Club was really loud – a lot of talking and Sprite sounds playing in the room. While it is generally fun to have your Sprites make sounds, it can be really loud if everyone is playing sounds. We didn’t have any headphones, so we had to remind students to keep the volume down.

Sports games for the final week

Lesson 5: Final Week – They asked many times for a sports game. So for the last week, we tried Scratch Cat Goes Skiing or Beat the Goalie! Both projects are from RPi Foundation’s Scratch projects, so I was able to put started projects in our weekly studio and the students would have the background and costumes for the projects. They turned out well for such difficult projects. Our last day was also Valentine’s Day, so I made this quick project Valentine for you in case anyone was interested in making a Valentine with the pen and stamp tools. Mostly they wanted to make games.

Valentine’s for Coaches – one of the code club members made Valentines for each of the coaches and me. It was so sweet. I’m pretty sure the high schoolers had not been given a Valentine for a long time.

Good enough: Five weeks was a good enough length. It was a lot of work being in charge of not just the 4th graders but of the coaches as well. To be honest, I had too many high schoolers coaching and their attention span and appropriate behavior weren’t much better than the 4th graders. So I ended up managing both groups. It was all good though. Good for the coaches to work with younger kids, pay it forward, and remember when they participated in Code Club. Good for the 4th graders to get to learn to code, and see older kids who like to code model coding. And good for my high school Computer Science program as these students move through the school district and may plan to take CS courses at the high school.

CSP 22-23 Year in Review

I just finished my first year teaching Computer Science Principles at my local high school and it’s time to reflect on the year and celebrate some of the outstanding projects made by my students. It was my first official year of teaching CSP and high school students. I had a group of 15 mostly seniors with a couple 10th & 11th graders. Eleven students took the AP CSP exam in May.

I used code.org’s CSP 22-23 curriculum, which I enjoyed. I was fairly true to the course, only augmenting here and there. I was pleased with it overall but I have some ideas for next year. I want the students to make more coding projects – especially before they start the AP CSP performance task. I could have been more prepared myself for PT expectations and have better prepared my students for it. This summer I will be taking more code.org professional development to dive deeper into CSP. I’m excited for cs teacher summer camp.

Early in the curriculum, the students learn about digital data and binary. I had them create bitmaps in Google Sheets. I’d like to do more next year. I have an addressable RGB matrix from Ada Fruit I’d like to set up for this unit.

First project: The students’ first project in code.org’s App Lab is in unit three. My students worked on a project in pairs and played with designing screens, adding and naming elements, and doing the coding of onEvents. App Lab’s IDE makes it pretty easy to get started with Javascript – being both text and block-based coding and having a full design toolbox. Here are two memorable first projects:

The next unit was on variables, conditionals, and functions. Most of the parts you need to make a decision-maker app. One of the key takeaways was to make an updateScreen function to call when onEvents happened. The updateScreen function would check all the conditions and display the results. It could be called from any button. I liked the EIPM setup of the unit. Lessons were ordered in Explore, Investigate, Practice, and Make to learn the concepts. Students worked in different pairs or individually for the final Make project. Here are two fine examples of their decision-maker apps.

I also started requiring comments. I think I’ll refine the comment requirements for the next round with a title, purpose, and author at the top. I did have some good commenters:

Unit 5 – List Loops and Traversals. This is where the rubber meets the road. For new-to-coding students, lists with indexes are a lot to take in. Loops can make sense, but then algorithms to work with data and very big lists can be daunting. The unit project is big and at the end, we’d had enough coding for the moment, which is unfortunate, because we could have used one more project before the AP Performance task began. Here are a couple of outstanding Hackathon projects:

After the Hackathon was the end of the first semester. Some students only take the first semester of CSP, the rest stay on to prepare for the AP test. One student who was going to take the full course bowed out at the end of the semester saying coding wasn’t for him. Another decided to stay – say coding was definitely for him and he is planning to major in Computer Science now. For the midterm, I wrote some review questions from Units 1-5 and had the students pick one project to improve.

In the Google form for the midterm, I forgot to collect any personal identifying information 🤣. I could mostly tell who’s test was who’s from the short answer questions, but I had to go back to the students to be sure I gave the right grade to the correct person. Here are a couple of improved App Lab projects:

Unit 6 was a very short unit on algorithms. It was a dry topic for them even though there were plenty of unplugged activities and online simulations to enhance the unit. I need to do better with it next year. I think it would balance nicely with creating a game in App Lab. Fortunately, I found out about Gimkit last summer. Students really enjoyed using Gimkit to study vocabulary. It didn’t seem to matter what game they played.

The last unit before the AP CSP Performance task is Unit 7 where we learn about functions with parameters and returns while creating libraries. I feel I could have done a better job on this unit and that would have prepared them better for the PT. Their functions turned out okay but most were not complex enough to meet the PT expectations. The concepts of a function as a black box, scope (the notion of global versus local variables), and how to deal with returns was lost on a few. The project guide had questions that were similar to the questions that were going to be on the AP Performance task – a nice preview of what was to come that I could grade and give them feedback on. I think I will need to figure out a way to improve my teaching of this unit. Here are a few example functions made by my students:

As a teacher, I felt Unit 8 was the hardest to orchestrate. I went over the AP performance task rules, examples, and planning guide. Then I had to be hands-off while I gave them three weeks of class time to complete the task. So much independent class time. It was hard not to answer their questions and only “keep them on task”. After all that class time, I still had three students not complete and turn in the PT task until days before it was due. I have to figure out a better plan for managing this unit – perhaps grading them for staying within the outlined time frame. I can’t post any of their projects yet as the AP CSP scores won’t be released until next month. I have my own unshared “scoring” of their PT tasks and will compare my expectations to their scores when the results come out.

Unit 9 was about data visualization and interpretation. I think this was a fairly easy unit for most of my students because a number of them have taken AP science or math courses, which would cover this. I also knew that we were going to do an extra unit on machine learning after the AP test which would address data bias even more. Their projects met all of the expectations but none of them were exemplars.

By Unit 10 we needed another App Lab project to create. I remember seeing the presentations of Unit 10 projects from the previous year and I remembered I was underwhelmed. It seemed quite a bit of time was spent not coding but looking at innovations and global impacts. Those are important topics but the end result didn’t justify the time invested. So I set a different end-of-unit project. I still made sure that they completed all of the relevant lessons on cybersecurity, innovation, and global impact, but I gave them the task of creating a clicker or other animation game.

This time I got some stellar projects from my students. It also helped relieve some of the monotony of taking the full-length MCQ practice tests I was simultaneously assigning as we prepped for the AP test. Here are some good examples:

Here are some great examples: Invisible Maze where you have to find the hidden walls to navigate to the trophy. Donut Clicker – so many levels, such great detail, and a Doodle Jump remake from an amazing coder (and future CS major).

And here is a legendary example: Castle Clicker will go down as a mega game that almost caused this future CS major to fail a class (different from mine) because he spent all his time on this game – in that other class and basically his whole available time for the two weeks. Here were my comments to this student about his project:

There are so many layers to this game. He definitely went beyond the expectations I had set for this project. He is a gamer and now wants to be a CS major.

The students felt prepared for the AP test and came back saying they have plenty of time to complete all of the MCQs. AP results come out in July. I’m only concerned about a few students.

After the AP test, we had about four weeks of class before the end of the school year. That reflection will need to be another blog post.

It feels good to put my reflections down in a blog post again.

AP CSA

After 20 years in education at my local elementary school, I have a new position in the fall at my local high school. I will be their Digital Learning Specialist (Tech Integrator) and CS teacher. It is really a dream job for me. I get to help teachers with their technology (my “superpower”) and teach kids computer science (my “passion”). I’m so excited for the fall.

I’ll be teaching two CS classes in the fall- Computer Science Principles and AP Computer Science A, and I’m using code.org‘s curriculum for both. Last year I assisted in teaching AP CS Principles and it was the first time AP CS Principles had been taught at the school. I made room in my schedule to be in their class every Thursday (plus any other special activity day as my elementary schedule allowed). It surprised me how much I enjoyed working with the high school students (half of whom I taught coding to in elementary school).

In preparation to teach code.org’s AP CSA curriculum, I spent a week in Maine at an EducateMaine-sponsored 5-day workshop. It was excellent. It was intense. I’ve just returned from it and while I’m tired, I’m still really excited about getting into the classroom and presenting the content to the kids. During the week I met other high school CS teachers and built a new personal learning community network.

The code.org’s AP CSA curriculum is new this year. Our workshop facilitators piloted the program last year and this summer is the first time code.org teacher training workshops are being offered. At my school, most of the students who were with me in CS Principles will be taking AP CSA, so while I was at the workshop I could envision pain points in the lessons based on my knowledge of those students.

There is a lot of vocabulary in AP CSA. At one point halfway through the workshop we played vocabulary Bingo from the vocabulary list of the first two Units alone and it was a struggle. Of course, we’d had 3 days with the terms. The students will have more time and practice with them through the course. It is good to know this before the year starts so I can plan vocab review activities and encourage the students to keep a journal or binder for vocab. I’ve already asked one student her best strategy for learning vocab and this was her reply:

I think it would be best if all students have some sort of notebook/ composition book where they write in all the vocabulary as it comes up in one section then when they move to a unit start another page and label it. In this way they can customize what they write about each thing such as adding examples or an analogy when helpful. Then at the end of the unit go through all the vocabulary and make sure we have each and every term.

AP CSP student going into AP CSA

The other CS teachers in my CSA cohort noticed the vocab-heavy curriculum, too. One created and shared with us the Unit vocab lists in GimKit. I hadn’t heard of this tech tool and we got a chance to play a quick round of virtual Capture the Flag. I think the students are going to like this vocab practice tool!

Me in a GimKit of Capture the Flag

I learned that the AP CSA test consists of multiple-choice questions (50%) and free-response questions FRQs (50%). The code.org curriculum introduces, scaffolds, and provides a lot of practice with FRQs. The AP test is all paper and pencil so the students will need to practice handwriting Java code, reading Java code, etc.

I’ve still got some more to learn and prepare for the start of school, but I feel I’m in a good place and have the support I need (or know where to find it) for AP CSA. Hopefully, this feeling lasts through to August.

CS Teachers at the Portland SeaDogs vs NH Fisher Cats Minor league baseball game. Photo by Angela Oechslie.

Do you want to know more? Well, I had to learn to accept non-closure at this CS Summer Institute, too.

Virtual Showcase 2022

Last week was my 13th showcase of projects for my 4th grade after-school Code Club and my 2nd one that was held virtually. We made it. After three weeks of working on their major independent project and some online meeting craziness, they presented 14 final (or near-final) projects.

For our virtual showcase format, a project was presented by the creator, then the students played or enjoyed the project, and finally, they gave a quick positive feedback comment while the next student got ready to present. We had 14 projects presented in one hour. Amazing.

Code Club Showcase project thumbnails

The final projects show a great deal of creativity and variety. It is incredible how much work went into some of these projects. I am very impressed with this group of students and grateful they all took the club seriously. I know it was not an ideal situation to learn to code in an online group but these kids were pretty motivated. They were also pretty self-sufficient and knew how to advocate for themselves to get the help they needed. They were also very patient when waiting for me to help them.

I enjoyed watching their projects progress over the weeks. Here are a few projects I am particularly impressed with: The Pipe is a maze game with a cool introduction, a couple of levels, and a secret code level.

I also like Cheesy Puffs clicker: This is a clicker game with a lot of flair. I knew this coder wanted to make a clicker game so I provided some material in our classroom to support him. I think he also found other clicker games on the Scratch community to get some ideas.

I am also really impressed by Shielder. I’m not sure how this was created but I don’t doubt that the student who created this could create this.

These next four really reflect the creativity and personality of their creators.

The quality of these projects is no different from any other showcase from other Code Clubs. It is just that this virtual code club felt like a lot of work because of the virtual nature of helping students with their coding issues remotely, but the results are gratifying. I hope they find more coding opportunities in the future.

Virtual Code Club Projects

I’m running another round of my after-school 4th grade Code Club virtually again. We are halfway through our 10-week session and have one more learning project next week before the students start working their final showcase projects. Students from the other side of town have joined us with their Code Club coach, Ms. G, just like last year.

I had 19 students sign up and 4 from the other side of town and we average 16 students online each week. We’ve used breakout rooms to divide the group to be able to help more students while they are working through the learning projects. We’ve offered two different projects one week – Maze and Flappy Parrot to give the students some options. We are using Google Classroom to communicate, post materials, and share Scratch studio links. A few students have dropped out because the virtual environment is too hard or stressful to manage while learning to code. I’ve offered my time in person during recess to support students in person.

Favorite things example

We started with our favorite things projects the first week to get to know each other. It helped to work through some basics of Scratch, signing in, sharing to studios, etc. as well as a refresher on Google Meet protocols – raising hands, chat etiquette and presenting. Then 2 Chatbot, 3 Space Junk, 4 Maze & Flappy Parrot, and finally next week, Create your own world. Many of my favorite projects! Ms. G would create and share a studio. I would create an example or starter project and post the material to our classroom.

Flappy parrot or Mazes week

Make your Heart Grow with Scratch Jr

I like to use February to promote kindness so I had my first-grade classes create Be Kind projects in Scratch Jr as a final project. I used this project to teach the send and receive messages blocks.

The first graders started in Seesaw with a video about being kind online and a music video from Sesame Street about Kindness and then a group discussion and a Kind Kids drawing prompt from Tracy Piltz on Seesaw (I may have played the music video a few more times as well). The next time we met we reflected on our kindness drawing and started creating an animated version in PBS Scratch Jr.

I reminded them that they could draw their own background. After creating or adding the background they needed two Sprite characters – I generally encouraged using people showing kindness to each other but being kind to animals is also good.

Kindness projects by 1st graders

A lot of them wanted to animate asking questions like “Do you want to be friends?” or “Do you want to play?” and then having a response so I showed them the “send a message” code block and the reciprocal “receive a message” block for the response. They did a pretty good job of coding those up.

I made sure to have enough time to share their projects after adding a title and naming their project. I encourage good naming habits. ScratchJr defaults to a Project # which I try to compare to having a library full of books titled Book #.

I’m thinking of making them into an animated movie to share with the school community but it is time-consuming to record all of the projects on the iPad and compile them.

I was having so much fun with this kindness project that I had Kindergarteners make Valentine’s Day animations – or Be Mine projects. In my K classes, I introduced (again?) Scratch Jr.’s drawing and editing tools to draw hearts. They struggled a bit with the order of choosing the drawing tool, drawing then switching to the fill bucket then back to the drawing tool but it was a good exercise.

After making the hearts we added a character to receive them. Then we used the blue code blocks to animated our valentines. I introduced the pink “grow” block to add growing to the movement of their Valentine hearts. It was so fun to say over and over “make your heart grow” to the little 5-year-olds. It was a bucket-filler for me and the kids had a great time – after some initial frustration learning new stuff. Some of them even experiemented with other pink blocks like “shrink” and “hide”. We didn’t have time to share the projects but their teachers came around and saw them.

K example Valentine animation

Choose Your Adventure with Scratch Jr

I’m enjoying teaching Scratch Jr during the 1st-grade classes’ weekly tech time. I still have my go-to Scratch Jr projects that I’ve blogged about but I’ve tried some new things out so far this year that I have enjoyed.

I like to fit my projects into the 1st-grade curriculum so when the teachers told me they were working on defining characters of a story, we used PBS Scratch Jr to create our own characters and animate them. When they started learning about the setting of a story, I had the students create a Choose Your Adventure (CYA) project.

1st grade CYA projects that were shared to my iPad

This was such a great project that I did this with all four 1st grade classes and we took the time to share the projects. (Re: -sharing: I have the students (with some help) Airdrop their projects to my iPad. My iPad is “mirroring” onto the classroom projector board. I get their “presents” and run their program for everyone to watch and enjoy. I ask the author to tell me which choice to make first)

In terms of coding, the Choose Your Adventure project introduced the “Start on Tap” and “Change Page” blocks for my 1st graders. I start the lesson by introducing what a choose-your-own-adventure style book is and talk about letting the player get to make a choice between two places to go. We then pick a starting background and choose two more adventure place backgrounds – now they have 3 pages.

Example character code

Next, they choose two characters for the first page. These are the characters the adventurers tap on to make the CYA adventure. The coding of these characters starts with two blocks – the gold “start on tap” followed by the red “change to page #”. Once they have the first page set up with navigation, I send them to those other pages to independently create the coding for the animated adventures. While they are creating characters and coding on those pages, I can circulate and help students. I generally ask them to test the program when I stop by their desk to see how it’s going.

Depending on the time, we can stop there and finish up on a second meeting. Otherwise, I have them go back to the introductory page again and add a title, like CYA, and some more code to the characters to let the player read the choices. These blocks are “start on the green flag” and “say”. The iPad keyboard has a text-to-speech button for the students to say the words if they don’t know how to spell them. (A super iPad feature for K and 1st grade). Other students may want to record their voice announcing the adventure choices.

Once their projects are tested they save them as CYA – I tell them that saving their projects as Project 3 is like having all the books in the library listed by number. “I want to read book 35 today.” And that generally gets them to rename their project.

I was really happy with the quality of coding and understanding of going to different pages. Some of them added “start on tap” to other pages to continue the adventure.

Other projects that 1st graders did this fall were Spooky Forest and Sunrise, Sunset from ScratchJr Curriculum activities. I’m planning to introduce Meet and Greet this year as well.

Last Fall’s 1st grade “Spooky Forest” and “Sun and Moon” projects

Next up is my own Be Kind project – with a tie-in to Digital Citizenship and February’s Be Kind online.

“Be Kind” projects from last year

New Approach

I tried a new approach with my intro to Scratch coding for 2nd graders this fall. I have decided I am tired of my winter scene project. These 2nd graders are using Chromebooks this year and I also didn’t want to set up 3 classes and 45 accounts in Scratch for one foray into coding. They do have some prior experience coding with Scratch Jr on iPads.

I decided on a favorite thing project where they could make their Sprites interactive with “When Clicked”. That is very much like the interactive winter scenes project but allows more creative scope. I also decided they would just save their projects to their Chromebooks. I would have them add them to a shared Drive or something and put them in a Scratch studio in my teacher account.

Thanksgiving was approaching so I framed the project as Thankful Things. I found a Seesaw activity called “Things to be Thankful For!” by Debra Locke that included a Kid President video and asked the students to respond with 5 things they were thankful for – like people, food, animals, clothes. It made the perfect project design plan. Students did a nice job with the prompt, too. (Seesaw is our K-2 LMS)

The second class time was an intro to Scratch and adding all the Sprites from our thankful plan. I allowed for some time for this. From their plan I knew some of the things they were thankful for wouldn’t be found from the Scratch Sprite library and I wanted to give them time to customize or draw their own. I mean, there is a taco Sprite but no pizza Sprite and who’s not thankful for pizza? For these 7 year olds, though, sometimes the Sprite options are too much fun and distracting to even remember what things they are thankful for. Luckily for the students, I was mostly interested in getting them using Scratch and doing some coding over following the Thankful theme.

We did add some simple “when clicked-do something” coding. We only got one or two coded and had to finish up on the third class period. Their code stacks are still very simple, but enough (especially with sounds and color changes) to make it exciting for them.

Logistically, it was tricky for the 2nd graders to load the previous project file each time – but it is tricky for them to do a number of things on their Chromebooks having only 3 months of experience with them. It did work well with prompting. They would download the Scratch project at the end of class and it would save to their device. We have one-to-one Chromebooks. Then they were able to upload the project file (.sb3) from their recent downloads when we met the following session. I was hoping they would be able to use Seesaw to upload and share the file with me, but the .sb3 file type is not something Seesaw accepts. In the end I made one account in the teachers name for each class inside my 2nd grade class and when their projects were complete, I would log in and add their project to the studio. This took more work in the moment. I had one person show the finished projects on the projector and that allowed students to see each others while giving me time to get to each student as they finished. The part that slowed me down in going to each student to help them share their project to our 2nd grade studio wasn’t the logging in but having to wait while the student thought of a title for their project.

It took more class time to do a first project this way but the results are projects that show more creative expression and individuality. They were excited to share their projects with their classmates.

Virtual Code Club revisited

Sometimes when it’s been too long since my last post it’s hard write about everything to catch up and I put off writing. Now it’s been longer so I’m going to just write and get started again.

This summer I thought my library club would be able to return to an in-person Code Club for middle school students 10-13 in the fall, but that didn’t happen and we’ve been holding our monthly meetings virtually.

In October I prepared to introduced the how to make a mouse trail video by Zoe/Zinnea, on the Scratch Team YT channel. A super fun, easy project with lots of room for creative play.

@ScratchTeam YT Channel Mouse Trail tutorial

I created a starter project in our Fall studio and also was prepared with alternative ideas including the Scratchtober SDS prompt.

Scratchtober design studio

I had one kid come to the online meeting. The same single kid that has been joining all summer long. She and I were a bit disappointed no one else joined. Coding is more fun with friends. We made the best of it and created cool mouse trail projects and hoped more kids would join in November.

In November I was really thinking if only one person comes that I should pause Code Club until we can meet in person. I prepared the Silly eyes project from Code Club. I love getting email from Code Club with new projects to try with my Creative coders! The silly eyes are separate sprites that swivel to point towards the mouse. I had seen and tried this type of animation years ago (Read a book project) but it was nice to have the step by step project directions for the students. I added RPiFoundation’s Gobo Watching as an example or remixable project to our club’s Scratch studio but didn’t have much hope anyone would show up. And….

Five kids showed up to code! Four made silly eyes projects and one tried the mouse trail project. Yay for Code Club. I guess we will keep meeting and persevere.

My Code Club’s November projects

Teaching Getting Unstuck

Last year I had the amazing opportunity to pilot the Creative Computing Lab’s Getting Unstuck curriculum with a fourth grade class. Our weekly coding sessions is what got me, the classroom teacher, and the students, through the year, honestly.

I started the class off with some introductory Scratch projects in the fall to get them familiar with Scratch online and some of the basics in preparation for starting Getting Unstuck in January. I created a class and Scratch usernames with my Scratch teacher account. The students use Chromebooks and Google Classroom so it was easy to share Scratch studio links, project instructions and GU journals whether we were remote or not.

Our starter projects for the fall were: Trick or Treat, Butterfly Gardens, and a Maze (for #CSEdWeek2020). These are some of my favorite, go to, introductory projects but they are all step-by-step, follow along projects that produce similar results. The creativity is limited and comes with boundaries. Still a great way to introduce Scratch and what you can do with it.

In January we started with the Getting Unstuck “When Clicked” module. I showed the introduction video, went over the design journal and we brainstormed about project ideas. We were going to look at the Inspiration studio next but ran out of time for that session. I met with them once a week for 30-40 minutes. It worked but modules took longer than I anticipated – mostly because the students, generally, wanted more time to work on their projects. At first it was hard to get them to share their unfinished projects in our class studio. I told them to consider them works in progress, or WIP, and that they could indicate that in the directions, notes or title. From my Scratch teacher account, I can’t look at projects unless they have shared them. Putting them in the design studio helps too.

Our first GU studio – so much creative coding!

In February we started the Getting Unstuck “Color Sensing” module. This one went better but the students had an idea of the process – how the journal works, the work flow and expectations. They had some experience sharing and reflecting. I also had a better understanding of the size and scope of projects they could create in the time I was giving them. Some of the students had such big ideas for projects and, as any coder knows, it always takes longer than expected to complete. Most of my students are novice coders but they were able to show so much expression, voice and creativity within this framework that I was happy to give them a little bit more time. I was also glad to see more reflection and more community (commenting and supporting each other) this time around.

Our third and final module was Getting Unstuck “Broadcast” module. I had planned to try the “Random” module as adding randomness to my projects is one of my favorite things, but I realized that my students weren’t ready. They were ready for broadcast and receive. One student had needed it for an earlier project. The students did a good job with this difficult concept and the GU unplugged activity really helped. The students had improved so much. They were seeing their own perseverance and growth (and writing about it in their journal) and were really enjoying giving and getting comments and especially the coding!

Commenting within a supportive community

That’s a quick overview of my experience. I also supported by the creators of the curriculum at the Creative Computing Lab and the other teachers piloting the project which was so helpful.

If you want to learn more, there’s a Getting Unstuck launch party! This party will take the form of a Twitter chat, using the #GettingUnstuck hashtag, on August 10 from 6–7pm EDT.