Last month the art teacher came to me with an idea for the super hero project she was doing with 3rd graders. She was thinking of adding a technology piece like a digital cartoon or animation. I told her the stunned look on my face was not “oh my gosh, that sounds like a lot of work,” but a “this could be really fun” and “there are so many ways to do this, which one do I suggest!” face. I decided to suggest the students make a Scratch project and use code to animate their superheroes.
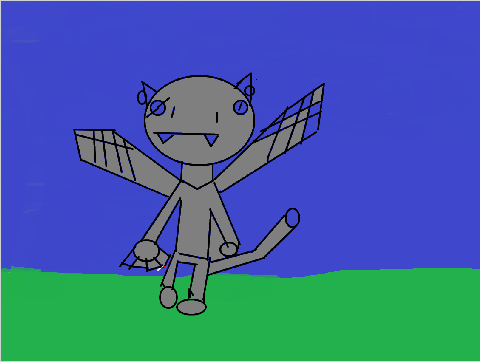
Vampire hero
I made some room in my schedule to accommodate the three art classes and used some of the 3rd grade computer lab class time to work on the projects. They worked on sketches and project ideas and a poster in art. In the computer lab they started by making a background in MSPaint. It’s a good place to warm up your mouse drawing abilities. Then they drew their superheroes in a new file – with a white background. Those who finished up early were able work on a sidekick or villain.
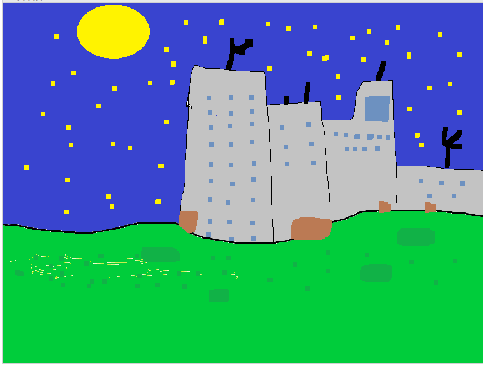
City background for the Stage
Next we imported the background on to the stage in Scratch 2 offline editor. (If the Paint file didn’t fill the Stage, they could grab a background color with the Scratch color picker tool and fill in the whitespace.
Finally we imported the superhero as a Sprite. The picture file usually contained a white background but Scratch allows you to set the fill bucket to “invisible” (ie alpha-channel) using the “red slash” color. This is a really useful tip that I wish I had known about it last fall! Just pick it, use the fill bucket, fill the white background with “invisible” and voila, a Sprite on an empty background.
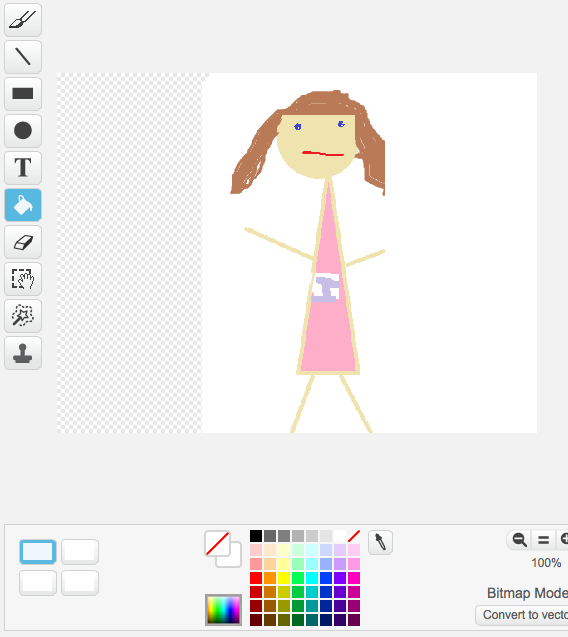
Use the red slash to control the alpha channel and make an invisible background
Now to code for the animation. I standardized the code to have the superhero say its name and then bounce around the screen. Students had to start with this and customize it by setting the direction, the number of steps and even adding changes to color, size or visibility. A few students added a second costume to show wings flapping – I’d like to do more of that next time. A few had a second Sprite – sidekick or villain. One had sound.
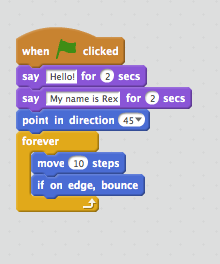
Basic animation code
Meanwhile I was looking for ways to capture the animation in video form – some kind of Screencast movie so I could compile all 63 superhero animations into a movie to share. I tried Screencastify but the free version would require a lot of editing and leaves a brand name tag on the video. Quicktime did an okay job on my iMac at home, but not useful for the Windows based computer lab. Then late last week I was working in Scratch 2 offline editor when it asked to update to the latest version 443. So I did. When I went to save the project I noticed a new option: Record Project Video.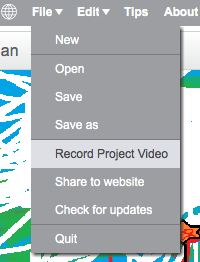
This was exactly what I was looking for! Unbelievable and just it time, too. The students would be able to do this part themselves if I could get the updated version in the lab. In the end that did not happen and I ended up recording all the project videos myself. When you record the project video they are saved as FLV files. I did have to convert them to MP4 files to make the movies. The movies are awesome! (video 1, video 2 and video 3) and a great way to showcase all of the student work.
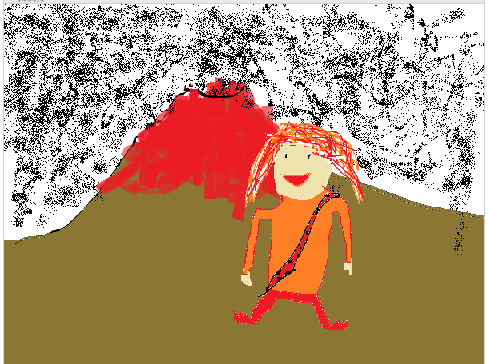
Lava Girl
Do you know what this means? Every 3rd grade student created a Scratch project this year! Incredible.
I enjoyed this STEAM collaboration with our fabulous elementary school art teacher immensely. I learned a lot and look forward to improving it the next time around.

Can we see this video?
LikeLike
Click on the 1, 2 or 3. They are links to the movies
LikeLike
This is great. I will have to send it over to the K-8 tech teacher. I know she has been looking to take programming down to the lower classes but has been hesitant. This is proof it is possible. And the record feature will be perfect.
LikeLike
I’m now starting a cloud project with 2nd graders. Will blog about the outcome soon…..
LikeLike